

Essential Guide to Crawl Space Encapsulation Benefits 2026
Introduction
Have you ever thought about what’s happening beneath your floors? Most homeowners don’t give their crawl space a second thought until something goes wrong. Maybe you’ve noticed musty odors wafting through your home. Or perhaps your energy bills have been creeping up without explanation. These could be signs that your crawl space needs attention.
Crawl space encapsulation is one of the smartest home improvements you can make. It’s not just about sealing off that dark area under your house. It’s about protecting your investment, improving your indoor air quality, and creating a healthier living environment for your family.
In this guide, you’ll discover everything you need to know about crawl space encapsulation. We’ll cover what it is, why it matters, how much it costs, and whether it’s the right choice for your home. By the end, you’ll have the knowledge to make an informed decision about this valuable home improvement.
What Is Crawl Space Encapsulation?
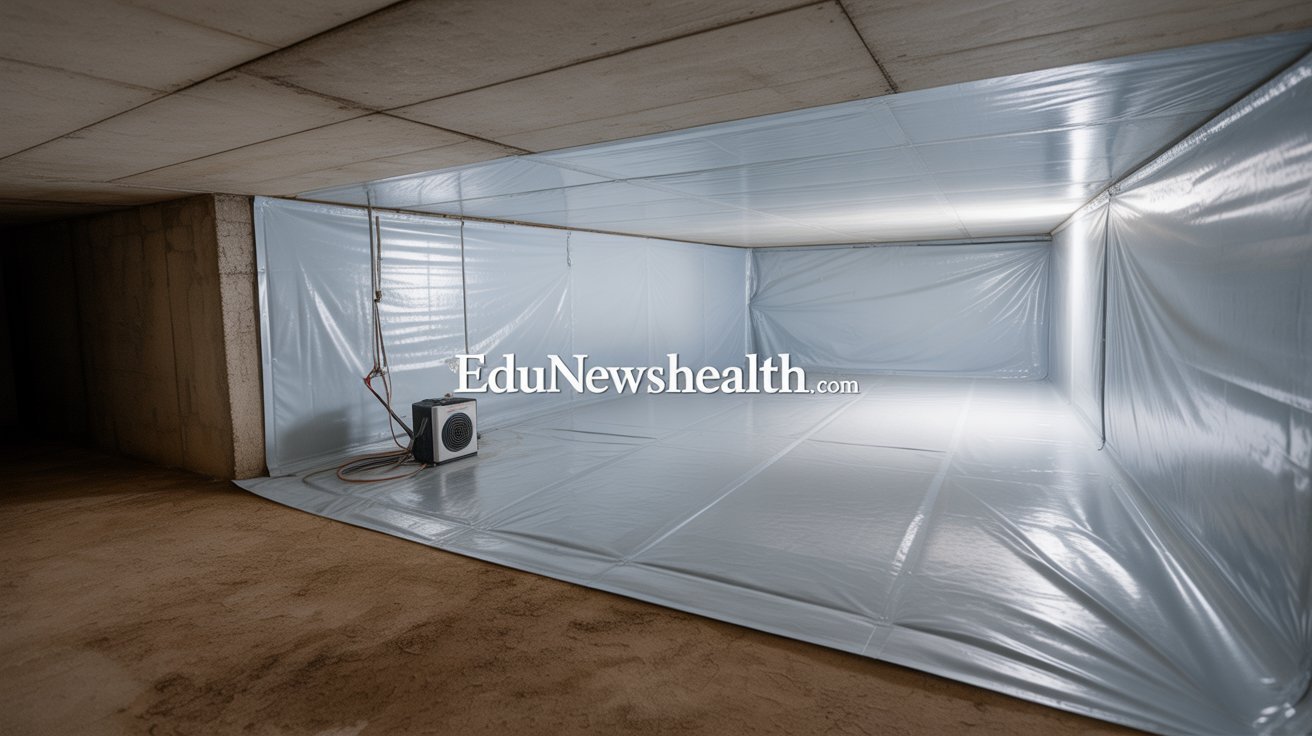
Crawl space encapsulation is the process of sealing your crawl space with a heavy-duty moisture barrier. Think of it as creating a protective shield between the ground and your home’s foundation.
The process involves covering the floor, walls, and sometimes even the ceiling of your crawl space with thick polyethylene plastic. This barrier typically ranges from 10 to 20 mils thick. That’s much stronger than regular plastic sheeting you’d find at a hardware store.
But encapsulation doesn’t stop there. A complete system usually includes:
- Vapor barrier installation on all surfaces
- Sealing of vents and openings to prevent outside air from entering
- Dehumidifier installation to control moisture levels
- Insulation improvements for better energy efficiency
- Drainage systems if water intrusion is an issue
The goal is simple. You’re creating a controlled environment that keeps moisture, pests, and outdoor air from affecting your home’s foundation and living spaces.
Why Crawl Space Encapsulation Matters
Your crawl space might seem isolated from the rest of your home. But that couldn’t be further from the truth.
Research shows that up to 50% of the air you breathe on your first floor comes from your crawl space. This is called the “stack effect.” Air naturally rises through your home, pulling whatever’s in your crawl space right up into your living areas.
The Moisture Problem
Uncovered crawl spaces are breeding grounds for moisture problems. The earth beneath your home constantly releases water vapor. Without proper sealing, this moisture seeps into your wooden floor joists, insulation, and ductwork.
High humidity creates the perfect environment for mold and mildew growth. These fungi don’t just smell bad. They can trigger allergies, asthma, and other respiratory issues. Some types of mold can even cause serious health problems.
Structural Damage You Can’t See
Moisture doesn’t just affect your health. It attacks your home’s structural integrity.
Wood rot is a serious concern in damp crawl spaces. Your floor joists and support beams can weaken over time. This leads to sagging floors, bouncy spots, and potentially expensive repairs down the road.
I’ve seen homes where the damage was so extensive that entire sections of flooring needed replacement. The homeowners had no idea anything was wrong until it was too late.
Energy Efficiency Takes a Hit
An unsealed crawl space makes your HVAC system work harder. Cold air in winter and hot air in summer both enter through vents and gaps. Your heating and cooling system has to compensate constantly.
Studies indicate that crawl space encapsulation can reduce energy costs by 10-20%. That’s real money back in your pocket every month.
The Benefits of Crawl Space Encapsulation
Let’s break down the specific advantages you’ll experience with a properly encapsulated crawl space.
Improved Indoor Air Quality
This is perhaps the most important benefit. When you seal your crawl space, you stop the flow of musty, contaminated air into your home.
You’ll notice the difference quickly. That damp basement smell disappears. Family members with allergies often report breathing easier. Your home just feels fresher overall.
Protection Against Mold and Mildew
By controlling moisture levels, you eliminate the conditions mold needs to thrive. The vapor barrier prevents ground moisture from entering. A dehumidifier keeps humidity levels in check.
Most experts recommend keeping crawl space humidity below 60%. With encapsulation, maintaining 40-50% humidity is completely achievable.
Pest Control Benefits
Rodents, insects, and other pests love damp, dark crawl spaces. They’re attracted to the moisture and the shelter.
Encapsulation makes your crawl space far less inviting. The sealed environment eliminates water sources. The barrier prevents easy entry points. Many homeowners see a dramatic reduction in pest problems after encapsulation.
Lower Energy Bills
We mentioned this earlier, but it deserves emphasis. Your HVAC system runs more efficiently when it’s not fighting against outdoor temperatures entering through your crawl space.
The insulation improvements that often accompany encapsulation add even more savings. Your home maintains temperature better. Your system cycles less frequently. The savings add up month after month.
Increased Home Value
A properly encapsulated crawl space is a selling point. Home inspectors note it positively. Potential buyers recognize the value of not inheriting moisture problems.
Some real estate experts suggest that crawl space encapsulation can increase your home’s value by several thousand dollars. More importantly, it can help your home sell faster when the time comes.
Usable Storage Space
Here’s a bonus many people don’t consider. An encapsulated crawl space can actually become usable storage.
You won’t have to worry about boxes getting moldy or items developing that musty smell. Some homeowners even finish their encapsulated crawl spaces to create additional functional square footage.
How Much Does Crawl Space Encapsulation Cost?
Let’s talk numbers. Cost is often the first question homeowners ask.
The national average for crawl space encapsulation ranges from $5,000 to $15,000. That’s a wide range, I know. Several factors influence where your project falls on that spectrum.
Size of Your Crawl Space
This is the biggest cost factor. Contractors typically charge per square foot for materials and labor.
Expect to pay between $3 and $8 per square foot for basic encapsulation. A 1,500-square-foot crawl space might cost $4,500 to $12,000 just for the encapsulation itself.
Condition of the Space
If you have existing water damage, mold remediation, or structural repairs needed, costs increase significantly.
Mold removal can add $1,500 to $4,000 to your project. Drainage system installation might add another $2,000 to $6,000. Foundation repairs can run even higher.
Materials and Features
The thickness and quality of your vapor barrier affect pricing. A 10-mil liner costs less than a 20-mil reinforced barrier.
Additional features impact costs too:
- Dehumidifiers: $1,200-$2,500 installed
- Sump pump systems: $1,000-$3,000
- Vent covers: $15-$50 each
- Insulation upgrades: $1-$3 per square foot
Geographic Location
Labor costs vary significantly by region. Urban areas typically charge more than rural locations. Areas with high demand for foundation work may see premium pricing.
DIY vs. Professional Installation
Some homeowners consider DIY encapsulation to save money. You can purchase materials for $1,500 to $4,000 for an average crawl space.
However, I generally recommend professional installation. Here’s why:
Professionals ensure proper sealing and installation. They identify underlying issues you might miss. They often provide warranties on their work. Most importantly, crawl space work can be challenging and even dangerous without proper knowledge.
If you have extensive mold, water damage, or structural concerns, professional help isn’t just recommended—it’s essential.
The Crawl Space Encapsulation Process
Understanding what’s involved helps you know what to expect. Here’s how the typical process unfolds.
Step 1: Inspection and Assessment
A professional evaluates your crawl space thoroughly. They check for water intrusion, existing damage, pest problems, and structural issues.
This assessment determines what prep work is needed before encapsulation can begin.
Step 2: Addressing Existing Problems
Any current issues must be resolved first. This might include:
- Removing damaged insulation
- Treating mold and mildew
- Repairing foundation cracks
- Installing drainage systems
- Fixing plumbing leaks
You can’t just cover up problems. They’ll only get worse underneath the barrier.
Step 3: Installing Drainage (If Needed)
If water intrusion is an issue, a drainage system goes in first. This typically includes a perimeter drain and sump pump to redirect water away from your foundation.
Step 4: Laying the Vapor Barrier
This is the main event. The thick polyethylene barrier is carefully laid across the entire crawl space floor.
It extends up the foundation walls, typically 6-12 inches. All seams are overlapped and sealed with special tape. The barrier is attached to walls with mechanical fasteners.
Attention to detail matters here. Even small gaps can allow moisture penetration.
Step 5: Sealing Vents and Openings
All foundation vents are sealed. Gaps around pipes and other penetrations are closed. The goal is creating an airtight seal.
Some older advice suggested venting crawl spaces. Modern building science has proven that sealed, conditioned crawl spaces perform far better.
Step 6: Insulation Installation
Depending on your climate and needs, insulation may be added to foundation walls. This is often spray foam insulation for maximum air sealing and R-value.
Step 7: Dehumidifier Installation
A dedicated crawl space dehumidifier is installed to maintain ideal humidity levels. These units are specifically designed for crawl space conditions.
They’re more robust than basement dehumidifiers and include features like automatic drainage and humidity controls.
Step 8: Final Inspection
The contractor does a final walkthrough to ensure everything is properly sealed and functioning. They’ll show you how to monitor and maintain your system.
Crawl Space Encapsulation vs. Other Methods

How does encapsulation compare to other crawl space treatments?
Traditional Vented Crawl Spaces
Old building codes required foundation vents. The idea was that airflow would dry out moisture. In practice, this rarely works.
Vented crawl spaces in humid climates actually introduce more moisture. The warm, humid outdoor air condenses on cooler surfaces inside. This creates more problems than it solves.
Vapor Barrier Only
Some contractors offer just a ground vapor barrier without full encapsulation. This is better than nothing but incomplete.
Without sealing walls and vents, you still have air infiltration issues. Moisture can still enter through foundation walls. Energy efficiency gains are minimal.
Conditioned Crawl Spaces
Full encapsulation creates what’s called a “conditioned” space. You’re bringing the crawl space into your home’s thermal envelope.
This is the gold standard approach. It provides the most comprehensive benefits for moisture control, energy efficiency, and indoor air quality.
Is Crawl Space Encapsulation Worth It?
This is the million-dollar question. Or more accurately, the several-thousand-dollar question.
For most homeowners, the answer is yes. Here’s why the investment makes sense.
Long-Term Savings
The energy savings alone can pay for encapsulation over time. If you save $50-100 monthly on utilities, you’ll recoup a $7,000 investment in 6-12 years.
Factor in avoided repair costs from moisture damage, and the financial case strengthens. Replacing rotted floor joists can cost $5,000-$15,000. Mold remediation runs $1,500-$4,000 or more.
Health Benefits Have No Price Tag
Improved indoor air quality affects your family’s health every single day. Fewer allergens mean fewer allergy symptoms. Less mold exposure reduces respiratory issues.
You can’t put a price on breathing easier and feeling healthier in your own home.
When Encapsulation Makes the Most Sense
Some situations make encapsulation particularly valuable:
- You live in a humid climate where moisture problems are common
- You’ve noticed musty odors or mold in your home
- Your floors feel cold or you have high energy bills
- You’re planning to sell and want to increase home value
- You have asthma or allergies aggravated by poor air quality
- You’ve had past moisture issues in your crawl space
When to Consider Alternatives
Encapsulation might not be necessary if:
- You live in an extremely dry climate with no moisture issues
- Your crawl space is already in excellent condition
- You’re planning major foundation work that would disturb encapsulation
- Budget constraints are severe (though financing is often available)
Maintaining Your Encapsulated Crawl Space
Once installed, your encapsulated crawl space requires minimal maintenance. But some attention keeps it functioning optimally.
Regular Monitoring
Check your crawl space every few months. Look for:
- Tears or damage to the vapor barrier
- Standing water or signs of moisture
- Pest activity
- Proper dehumidifier operation
Dehumidifier Maintenance
Your dehumidifier is the workhorse of moisture control. Empty or drain it regularly if it’s not plumbed for automatic drainage.
Clean the filter monthly. Most manufacturers recommend annual professional servicing.
Address Issues Promptly
If you notice any problems, don’t delay addressing them. A small tear in the barrier is easy to patch. Left unattended, it becomes a bigger issue.
Keep Records
Maintain documentation of your encapsulation work. This includes warranty information, installation dates, and any maintenance performed.
These records prove valuable when selling your home or if warranty claims become necessary.
Common Crawl Space Encapsulation Mistakes to Avoid
Even professional jobs can have issues if shortcuts are taken. Be aware of these common mistakes.
Using Inadequate Barrier Material
Some contractors use thin plastic to save money. Anything less than 10 mils thick won’t hold up. A 20-mil reinforced barrier is ideal for long-term performance.
Incomplete Sealing
Leaving vents open or failing to seal all seams defeats the purpose. The encapsulation must be complete for maximum effectiveness.
Skipping the Dehumidifier
A vapor barrier alone can’t maintain ideal humidity. You need active dehumidification in most climates.
Ignoring Existing Water Problems
Encapsulation isn’t a solution for active water intrusion. Drainage issues must be addressed first.
Poor Installation Quality
Wrinkled barriers, gaps in coverage, and improper fastening all reduce effectiveness. Choose experienced contractors who specialize in crawl space work.
Choosing the Right Contractor
Your results depend heavily on contractor quality. Here’s how to choose wisely.
Look for Specialization
Foundation and crawl space specialists typically do better work than general contractors. They understand the nuances of moisture control and building science.
Check Credentials
Look for contractors who are:
- Licensed and insured
- Certified by industry organizations
- Experienced with encapsulation specifically
- Willing to provide references
Get Multiple Quotes
Aim for at least three detailed quotes. Compare not just price but scope of work, materials specified, and warranty terms.
Beware of quotes significantly lower than others. This often indicates inferior materials or incomplete work.
Ask the Right Questions
Before hiring, ask:
- What thickness vapor barrier do you use?
- What brand dehumidifier do you install?
- How do you handle sealing and fastening?
- What’s included in your warranty?
- Can I see examples of completed projects?
- What prep work is included in your quote?
Review Contracts Carefully
Get everything in writing. The contract should specify materials, work scope, timeline, payment terms, and warranty details.
Never pay the full amount upfront. A standard payment schedule might be 1/3 to start, 1/3 at midpoint, and 1/3 upon completion.
Conclusion
Crawl space encapsulation is more than just a home improvement project. It’s an investment in your health, comfort, and your home’s longevity.
Yes, the upfront cost can seem significant. But when you consider the energy savings, avoided repair costs, improved air quality, and increased home value, the math works in your favor.
You spend most of your life in your home. Making sure it’s healthy, efficient, and structurally sound just makes sense. Crawl space encapsulation delivers on all these fronts.
If you’ve noticed moisture issues, musty smells, or rising energy costs, don’t wait. The longer moisture problems persist, the more damage they cause. Start with a professional inspection to understand your specific situation.
Your crawl space might be out of sight, but it shouldn’t be out of mind. Take control of what’s happening beneath your floors, and you’ll enjoy the benefits for years to come.
Have you had your crawl space inspected lately? What moisture issues have you noticed in your home? Share your experiences in the comments below.
Frequently Asked Questions
How long does crawl space encapsulation last?
A properly installed crawl space encapsulation system can last 20-25 years or more. The vapor barrier itself is extremely durable when made from quality materials. The dehumidifier will need replacement every 5-10 years depending on usage. Regular inspections help catch any issues early, extending the system’s lifespan even further.
Can I install crawl space encapsulation myself?
While DIY installation is possible, it’s not recommended for most homeowners. Proper installation requires identifying hidden moisture sources, ensuring complete sealing, and correctly sizing dehumidification equipment. Mistakes can be costly and reduce effectiveness. If you have extensive mold or structural issues, professional help is essential. DIY only makes sense for very small, simple crawl spaces with no existing problems.
Will encapsulation prevent all moisture problems?
Encapsulation dramatically reduces moisture issues but isn’t a magic fix for active water intrusion. If you have foundation leaks, poor grading, or groundwater problems, these must be addressed first. The encapsulation system keeps normal ground moisture out and controls humidity effectively. Think of it as prevention rather than a cure for serious water problems.
Do I need to condition my encapsulated crawl space with HVAC?
Not necessarily. A properly sealed crawl space with a quality dehumidifier can maintain appropriate conditions without HVAC conditioning. However, some building codes or extreme climates may benefit from minimal conditioning. Your contractor can advise based on your specific situation. Many homeowners find the dehumidifier alone sufficient for moisture and temperature control.
How does encapsulation affect my home insurance?
Some insurance companies offer discounts for crawl space encapsulation because it reduces moisture-related damage risks. Others may not change premiums but will view it favorably. Always document your encapsulation work with before and after photos and keep receipts. This helps if you ever file a claim. Check with your insurance agent about potential savings or requirements.
What humidity level should I maintain in an encapsulated crawl space?
The ideal humidity range is 40-50% relative humidity. This prevents mold growth while avoiding overly dry conditions. Never let humidity exceed 60%, as this creates conditions where mold can thrive. Your dehumidifier should have a built-in hygrometer and automatic controls to maintain this range. Monitor humidity regularly, especially during seasonal changes.
Can encapsulation help with radon issues?
Crawl space encapsulation can reduce radon levels by sealing the primary entry point—your crawl space floor. However, it’s not a guaranteed radon mitigation solution. If radon is a concern, test your home before and after encapsulation. You may need a dedicated radon mitigation system with active venting. Many contractors can install both systems simultaneously for maximum effectiveness.
Will encapsulation void my foundation warranty?
Reputable encapsulation work should not void foundation warranties. However, always check your warranty terms before proceeding. Some warranties require notification of work near the foundation. Poor installation that damages foundation elements could create issues. Choose experienced contractors who understand foundation systems and can work without compromising existing warranties.
How soon will I notice energy savings?
Most homeowners notice reduced energy bills within the first month, especially during extreme weather. Winter heating costs often drop first because you’re no longer losing warm air to a cold crawl space. Summer cooling savings appear as well, though they may be less dramatic. Track your bills for several months to see the full impact. Remember that savings vary by climate, home size, and energy costs.
Is financing available for crawl space encapsulation?
Many crawl space contractors offer financing options or work with lenders who specialize in home improvement loans. Some homeowners use home equity loans or lines of credit. Energy-efficient improvement loans may offer favorable terms since encapsulation reduces energy consumption. Check for any local or state rebate programs that might offset costs. Don’t let financing concerns prevent you from addressing moisture problems—the cost of waiting is often higher.
ALso Read : YoungBoy Concert